Introduction
In modern real estate, visual content is more than a luxury—it is a necessity. While high-quality photos draw attention, it is the Floor Plan Drawing that provides structure and clarity. According to a 2023 Zillow consumer report, more than 80% of homebuyers find floor plans very useful when evaluating listings. Properties with floor plans receive up to 50 percent more engagement compared to those without them.
If you are a real estate agent, investor, or photographer looking to enhance your listing quality, learning the essentials of Floor Plan Drawing can significantly boost your value proposition. This comprehensive guide explores how to create, digitize, and use floor plans to elevate your listings.
Step 1: Floor Plan Drawing Begin with Existing Plans if Available
Before starting a new Floor Plan Drawing from scratch, it is worth checking if architectural plans already exist. These could come from previous owners, architects, or developers. Common formats include PDFs, CAD files, or printed blueprints. Having access to these files provides a reliable base that ensures greater accuracy while reducing time on site.
Many professional redraw services such as Digihomestudio.com can convert these existing plans into polished digital assets within one business day. This is especially helpful when dealing with multiple properties or large developments. Using original plans also reduces the margin of error that often results from manual remeasurement.
However, if no plan exists or if the property has been altered significantly, creating a new Floor Plan Drawing is the next best step.
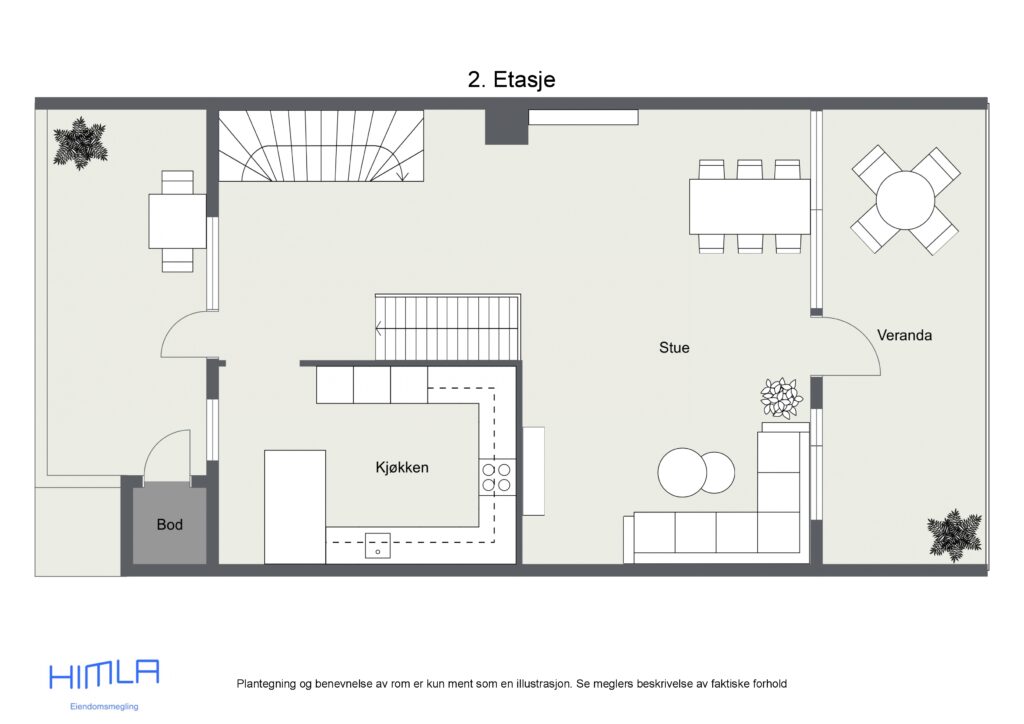
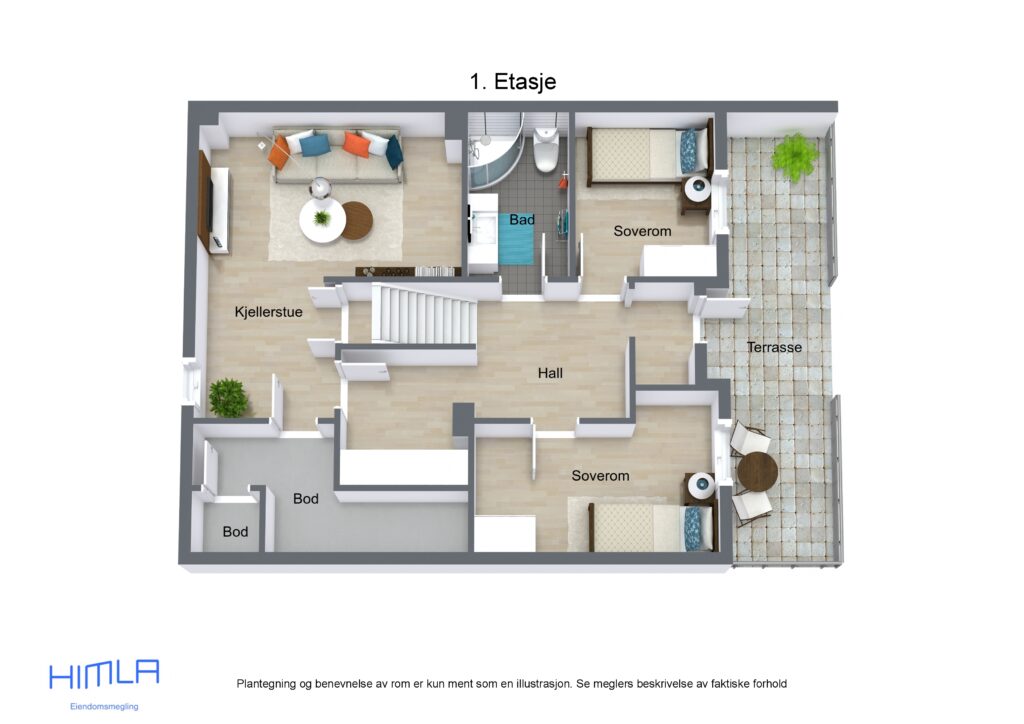
2D Floor Plan by Digihomestudio.com
Step 2: Floor Plan Drawing Assemble the Right Tools for Accurate Measurements
Accuracy is the foundation of any effective Floor Plan Drawing. Having the right tools on hand will streamline the measuring and sketching process while reducing errors. Here is what you need before heading on-site
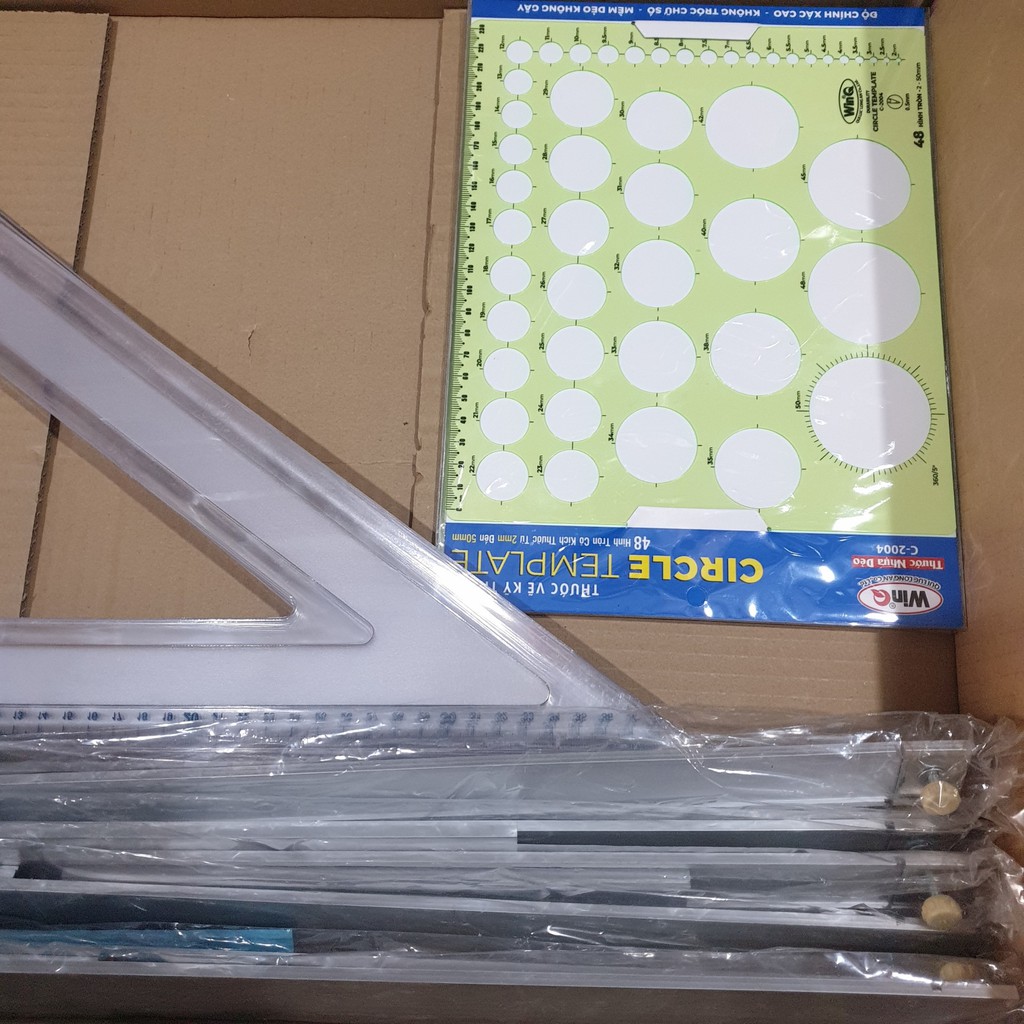
- A laser distance measurer for precise room dimensions
- Graph paper with pre-printed gridlines to maintain scale
- Pencil and eraser for sketching and corrections
- A clipboard or sketch board for stability during fieldwork
- A ruler or straightedge for clean lines
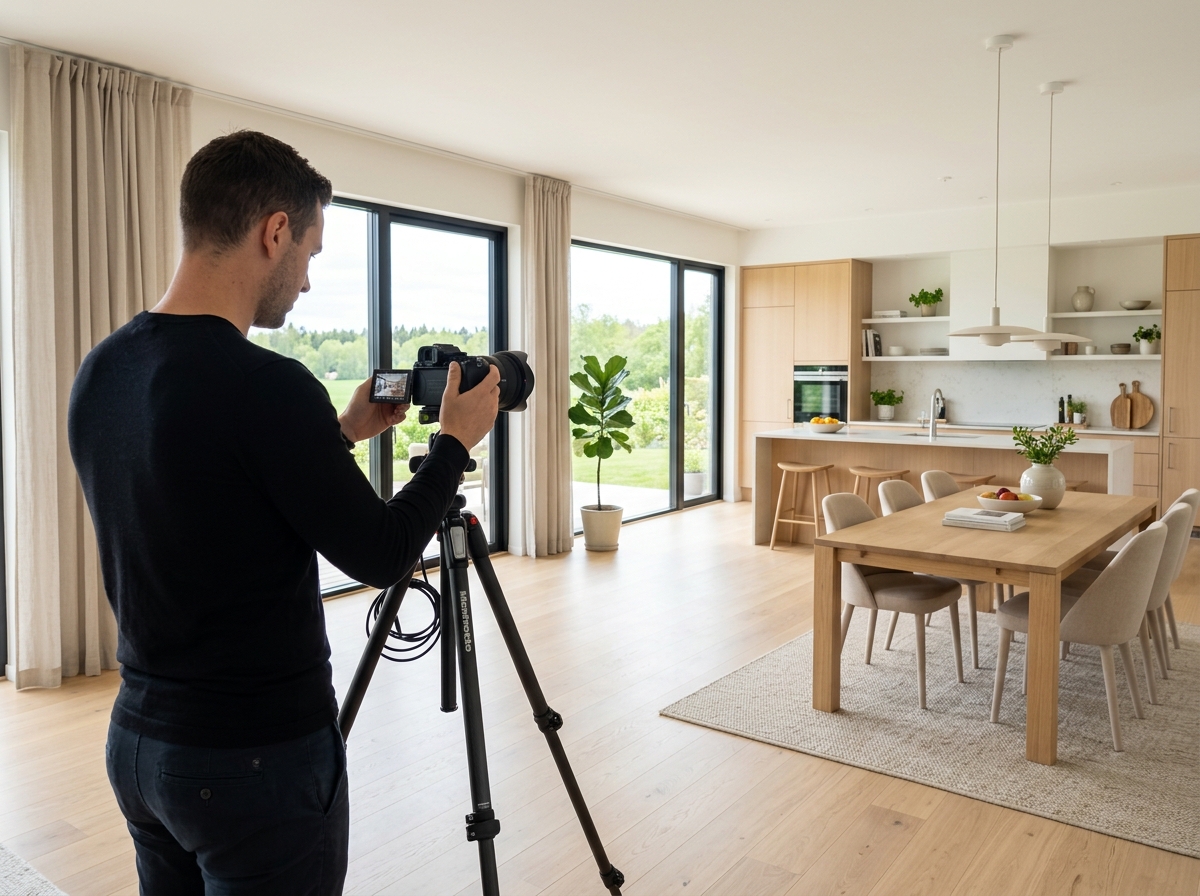
- A smartphone or camera to take reference images during the walkthrough
Reports from the National Institute of Building Sciences show that up to 70% of planning errors stem from inaccurate field measurements. Investing in quality measuring tools can prevent delays and save money during the redraw or construction phase.
Step 3: Floor Plan Drawing Choose Layout Orientation and Scale
Once your materials are ready, the first thing to consider in your Floor Plan Drawing is layout orientation and scale. These decisions will impact how well your sketch fits on paper and how easily it translates into a digital format.
Choose portrait layout for narrow or multistory buildings. Opt for landscape format for wide single-level homes or commercial properties. Start sketching from the bottom left corner of your page to allow room for directional arrows and labeling.
Next, decide on a working scale. One square on your graph paper might represent one foot or half a meter, depending on your region. Use consistent units throughout the drawing to avoid confusion. Finally, include a north arrow in your drawing. This directional reference helps viewers visualize sunlight direction, layout flow, and room orientation.
Step 4: Floor Plan Drawing Measure and Sketch the Exterior First
Every Floor Plan Drawing should begin with a clearly defined building envelope. This means measuring and sketching all exterior walls before moving inside. Begin at one corner of the building and work your way around the perimeter in a clockwise or counterclockwise fashion.
Use your laser measurer to record distances from corner to corner. Include porches, garages, balconies, and any other permanent outdoor structures. When direct measurement is obstructed, break long walls into smaller segments and add them together.
The accuracy of this exterior outline is critical. According to BoxBrownie, more than half of all plan corrections result from mismeasured or incorrectly drawn exterior walls. A solid perimeter drawing becomes the framework that guides your entire plan.
Step 5: Floor Plan Drawing Add Interior Walls Rooms and Fixtures
With your external boundaries complete, it is time to move indoors and capture the finer details of the property. A well-constructed Floor Plan Drawing includes not only room shapes but also doors, windows, and permanent fixtures.
Start by measuring the width and depth of each room. Label each space clearly with names such as bedroom kitchen laundry or living area. Mark doors with their swing direction. Indicate the size and placement of windows including their height from the floor if possible. Add fixed elements like sinks toilets bathtubs kitchen counters and staircases.
Accuracy in this step can directly affect buyer decisions. A 2023 survey from the National Association of Realtors found that over 60% of prospective buyers use floor plans to narrow their search before attending viewings. They rely on these drawings to understand space flow and room functionality before stepping foot on the property.
Be as detailed as possible. Avoid guessing dimensions or approximating positions. Even a small measurement error can make your plan appear unprofessional or misleading.
Step 6: Floor Plan Drawing Convert Hand Sketches into Digital Assets
After you have completed the initial sketch, the next step is to convert your Floor Plan Drawing into a digital version that can be shared with buyers and clients. There are several ways to achieve this, depending on your budget and technical expertise.
One popular method is to scan or photograph your sketch and send it to a redraw service such as Digihomestudio.com. These professionals convert your draft into a clean digital format, offering options such as black and white, colored, textured, or 3D floor plans. They deliver finished files within 24 hours and support various export formats suitable for real estate platforms.
If you prefer to do it yourself, tools like RoomSketcher or Floorplanner provide user-friendly interfaces that allow you to trace and design your plan online. For advanced users, software such as SketchUp or AutoCAD allows for greater customization and integration with other architectural documents.
Always review the final draft carefully before uploading. Check for spelling errors in room labels, misaligned measurements, or omitted fixtures. A polished floor plan builds confidence and professionalism in your listing.
3D Floor Plan by Digihomestudio.com
Step 7: Floor Plan Drawing Use Floor Plans as a Marketing Advantage
A high-quality Floor Plan Drawing is more than a visual reference—it is a competitive marketing tool. Listings that include floor plans generate more interest and lead to faster sales. According to Redfin research, homes with detailed layouts sell up to 15 days faster and receive more qualified inquiries.
Floor plans help potential buyers visualize the space, understand room relationships, and plan for furniture or renovations. They also play a crucial role in virtual tours, allowing remote buyers to navigate a property with clarity.
Incorporating floor plans into your marketing materials—such as brochures email campaigns websites and social media—enhances listing quality and encourages engagement. They show that you are transparent, detail-oriented, and professional, traits that buyers and sellers both appreciate.
Real estate marketing strategist Chelsea Peitz states that floor plans are no longer an optional feature—they are an expected standard. A listing without one may appear incomplete or less credible in the eyes of today’s digital-savvy buyers.
Step 8: Floor Plan Drawing Avoid Common Mistakes for Better Results
Even the best intentions can lead to errors. To ensure that your Floor Plan Drawing is accurate and effective, steer clear of these common pitfalls
- Inconsistent use of scale throughout the drawing
- Illegible handwriting or unclear room labels
- Omitting windows, doors, or important fixtures
- Forgetting to include a directional arrow
- Not double-checking measurements before submission
Also, always photograph each room while sketching. These reference photos help redraw professionals understand the property layout and verify elements that may not be clearly visible in your drawing.
The more detail you provide, the better your final product will be. A complete and precise floor plan reduces questions from buyers and enhances their experience while viewing the listing.
Conclusion
Floor Plan Drawing is a skill that bridges design, communication, and real estate strategy. It transforms raw space into visual logic, helping buyers understand how a property flows and functions. Whether you are sketching it by hand or outsourcing it to professionals, a floor plan can make your listing stand out in a crowded marketplace.
You do not need to be an architect to offer this powerful visual asset. With a laser measurer, a sheet of graph paper, and a basic understanding of how homes are structured, anyone can begin creating floor plans that attract more buyers and close deals faster.
By incorporating Floor Plan Drawing into your real estate toolkit, you show clients and prospects that you go the extra mile. You help them see what cannot be captured in a photograph—the rhythm of a hallway, the openness of a kitchen, or the privacy of a master suite.
In a market where time is money and clarity is everything, a floor plan is more than a sketch. It is your blueprint for success.